Materials:
Cotton – I used a cotton that is about equivalent to a size 3 thread in the US. The lady who taught this dishcloth to me used Cotton Carpet Warp for hers.
Hook – Appropriate for size yarn – I used a size 2 steel hook
Stitches used :
Sc = single chain
Dc = double chain
Ch = chain
Sl st = slip stitch
Cluster = Ch 3 and 3 Dc in space indicated
Instructions:
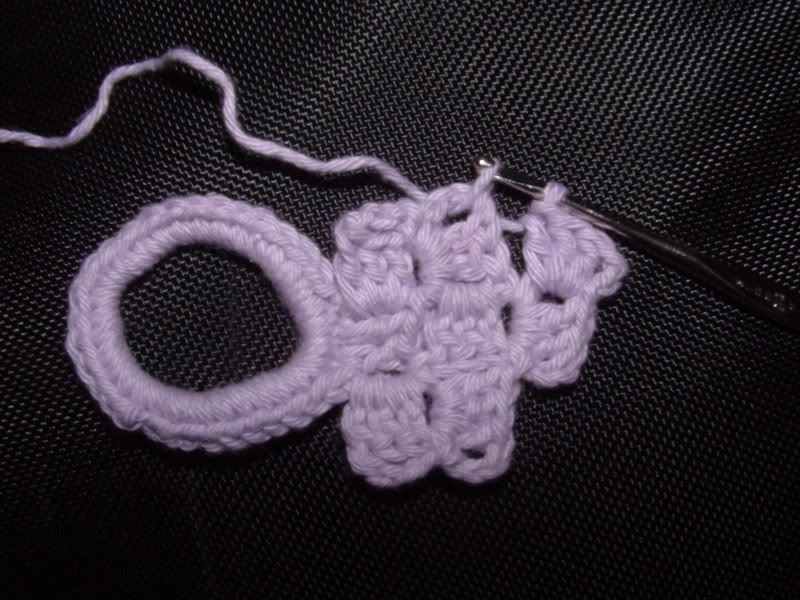
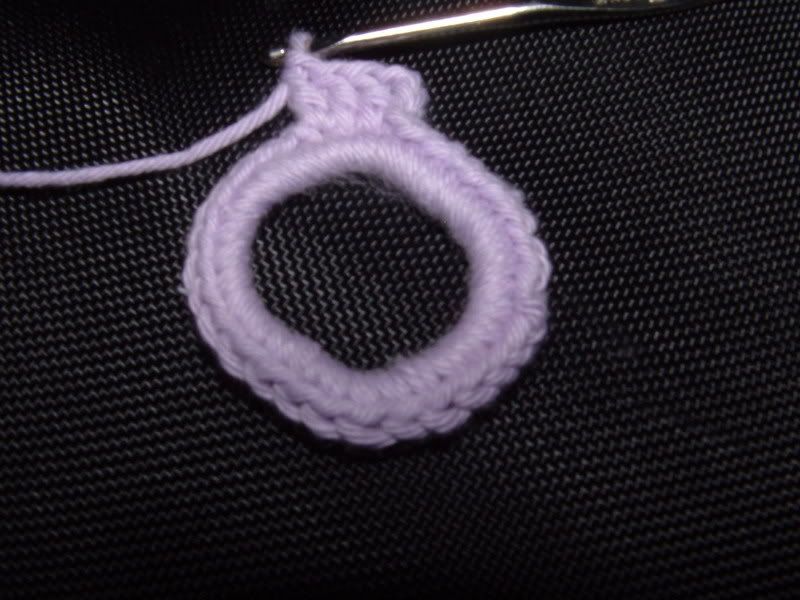 Wrap yarn around your middle and index finger 5 times. Grasping the loops with your thumb and index finger, Sc around the circle and connect with a Sl st to the first Sc.
 Ch 3, 3 Dc in next 3 Sc
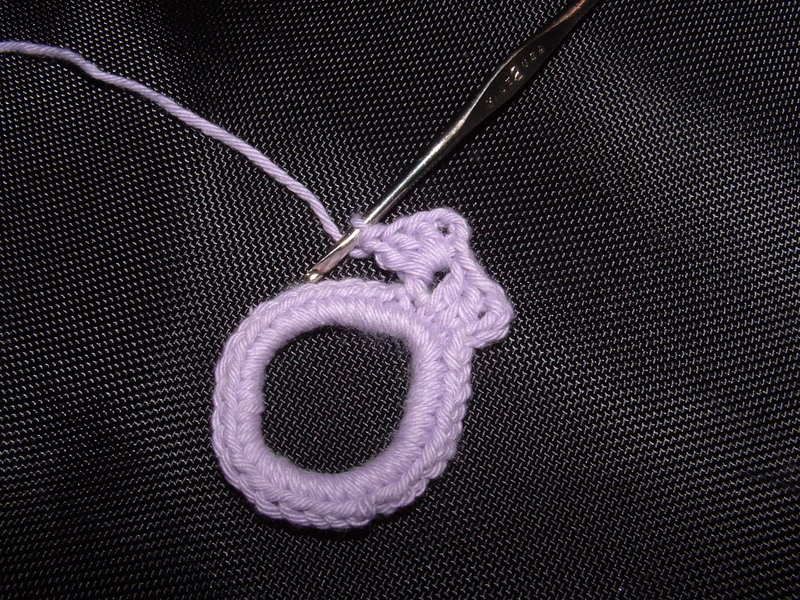 Cluster (Ch 3, 3 Dc) in the space between the 2nd and 3rd Dc
 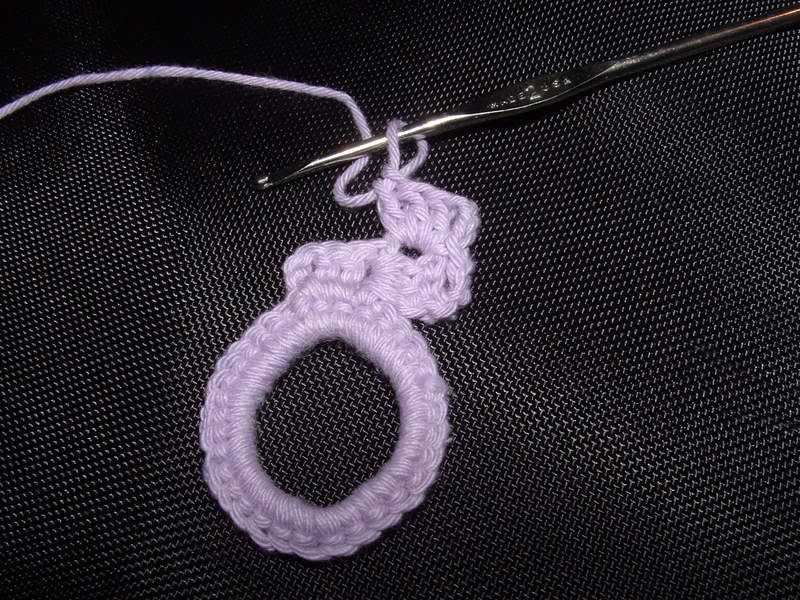 Ch 3, turn and Sl st in the space between the Ch 3 and the first Dc of the cluster just made. Cluster in the same space.
 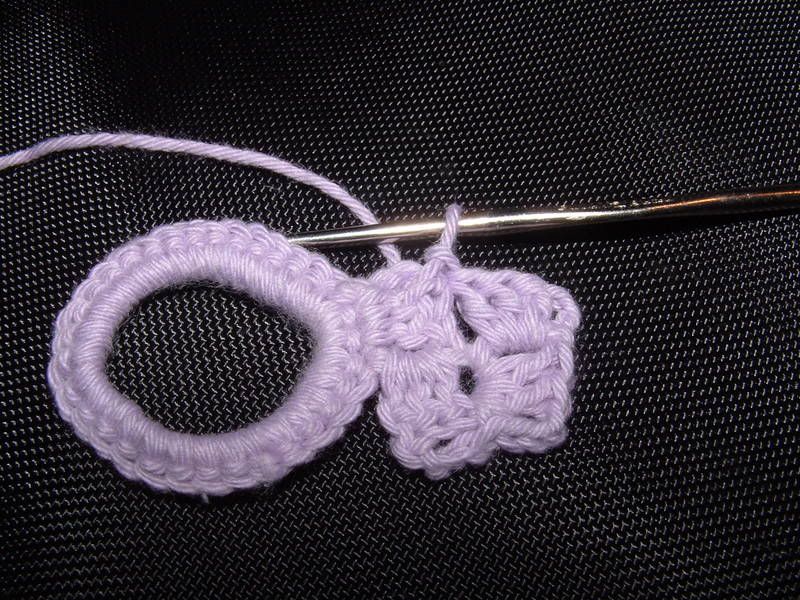 Cluster in space between 2nd and 3rd Dc of the cluster just made. Sl st in Ch 3 space of first Cluster to attach the two clusters together. (Square of 4 clusters)
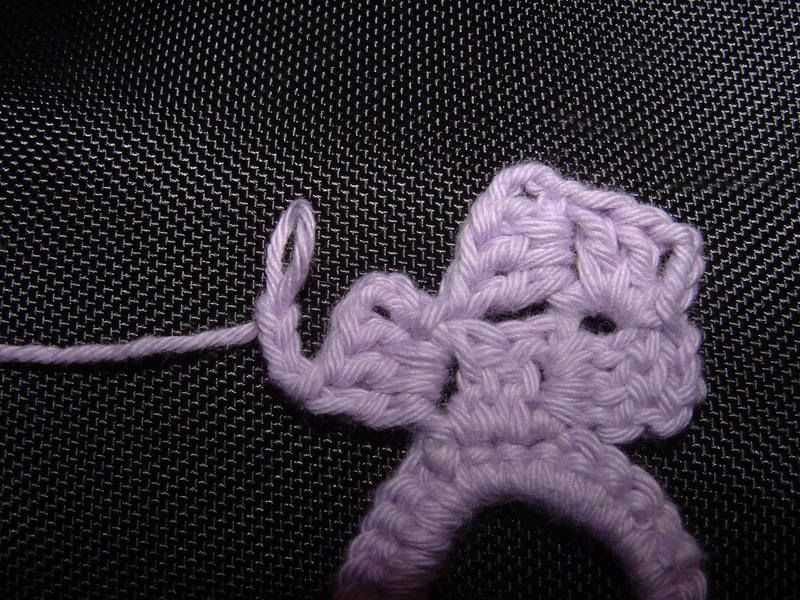
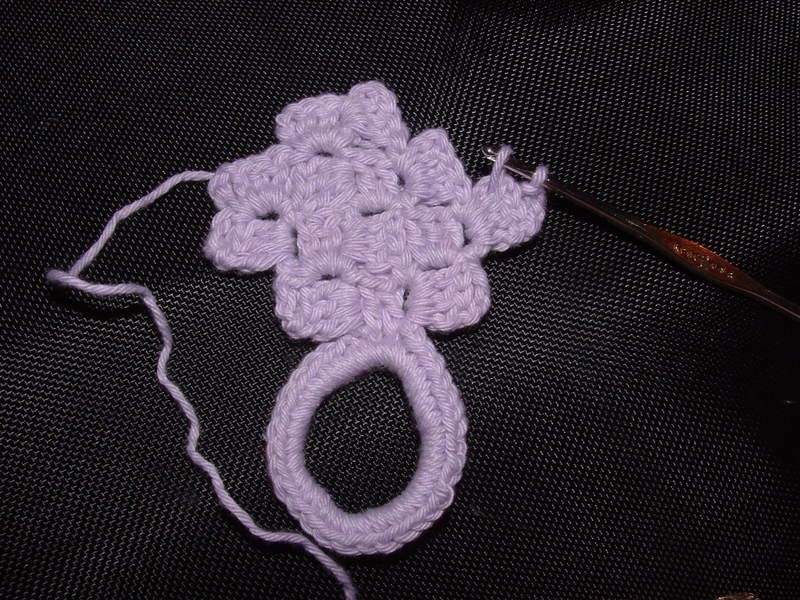
Cluster in Ch 3 space of first cluster. Ch 3, turn, Sl st in Ch 3 space of cluster just made. (picture before turn)
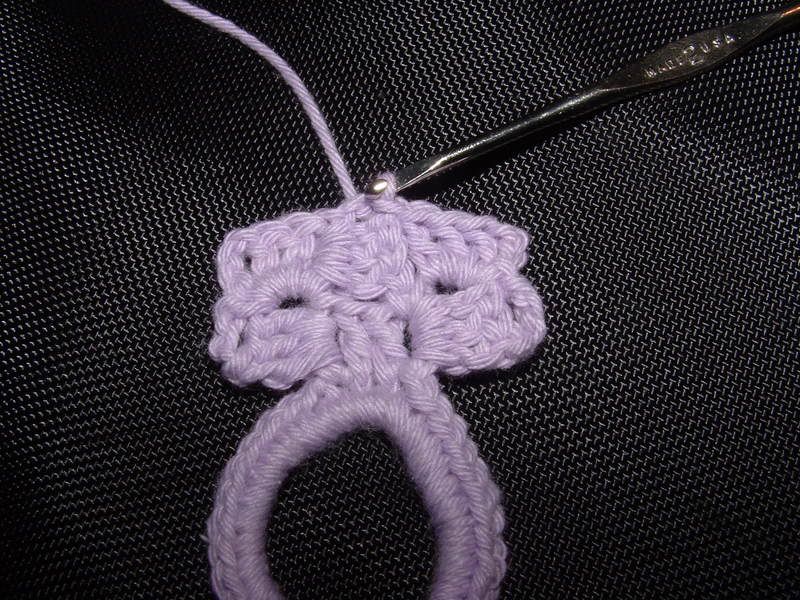 Cluster in same space, Sl st in Ch 3 opposite (Rectangle of 6 clusters - picture)
 Cluster in same Ch 3 space.
 Cluster in space between 2nd & 3rd Dc of previous cluster, attach with a Sl st in Ch 3 space of the cluster to the left.
 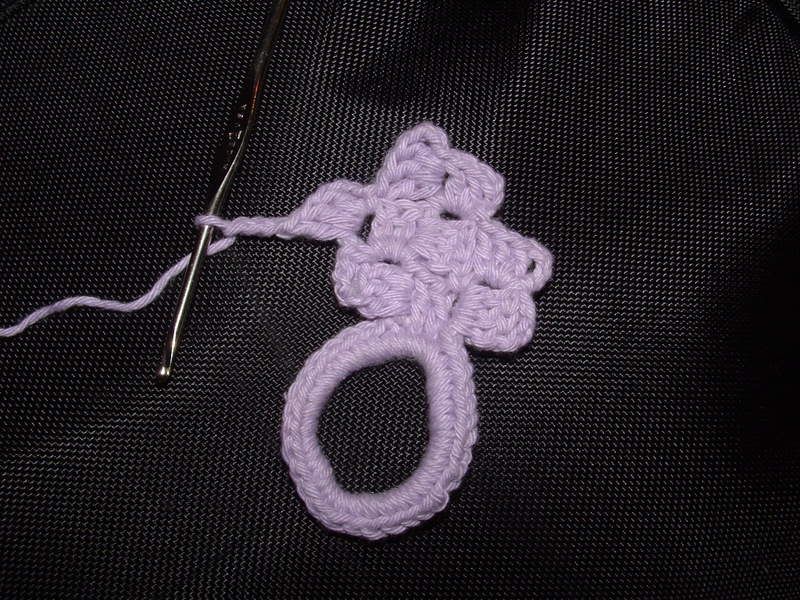 Cluster in the same Ch 3 space, Ch 3, turn and attatch with a Sl st to Ch 3 space of the cluster just made. (picture before turn)
 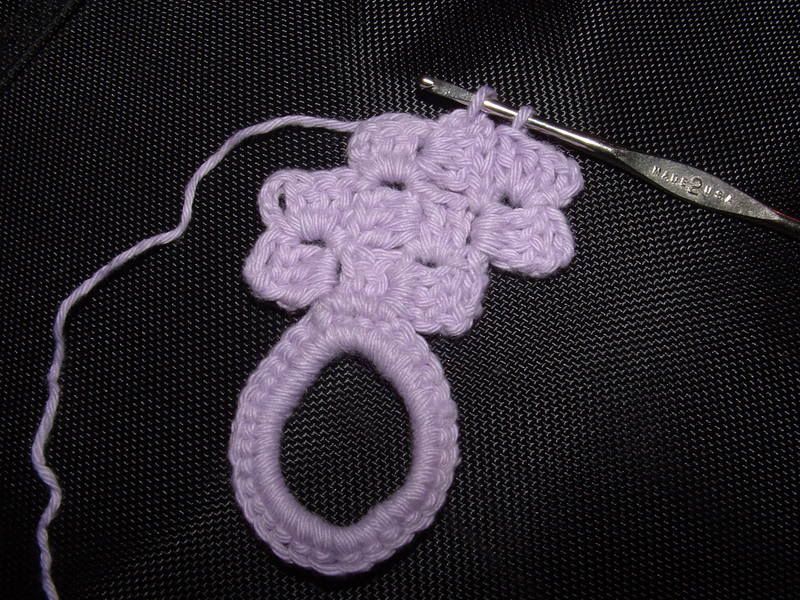 Cluster in same Ch 3 space, attatch with a Sl st in the Ch 3 space of the cluster to the left.
 Cluster in the same Ch 3 space.
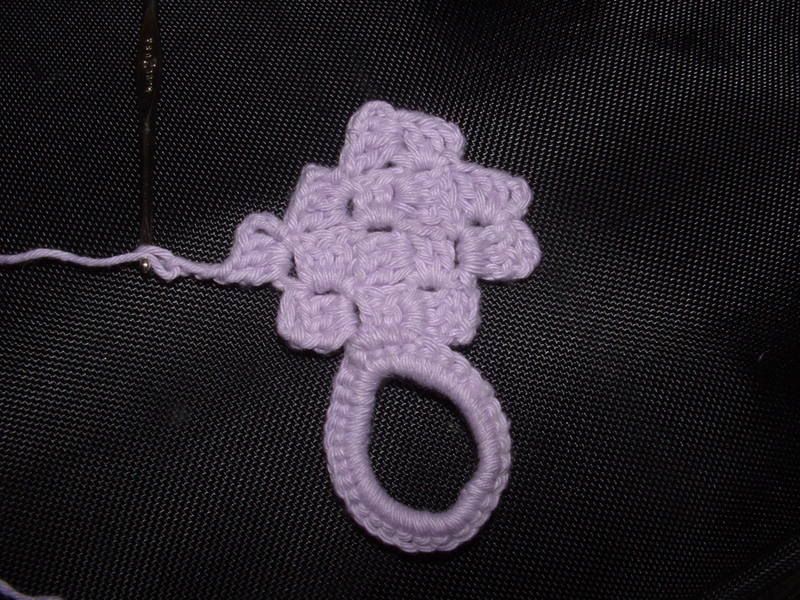
Cluster in space between 2nd and 3rd Dc of the cluster just made. Sl st in the Ch 3 space to the bottom left and Cluster in that same spot.
Sl st in the Ch 3 space to the bottom left and Cluster in that same spot. (left picture below)
Ch 3, turn, Sl st in Ch 3 space of cluster just made. (right picture below)
 Cluster in the same Ch 3 spot, and attach with a Sl st to the Ch 3 space of the Cluster to the left. Cluster in that spot, and attach with a Sl st to the Ch 3 space of the Cluster to the left.
 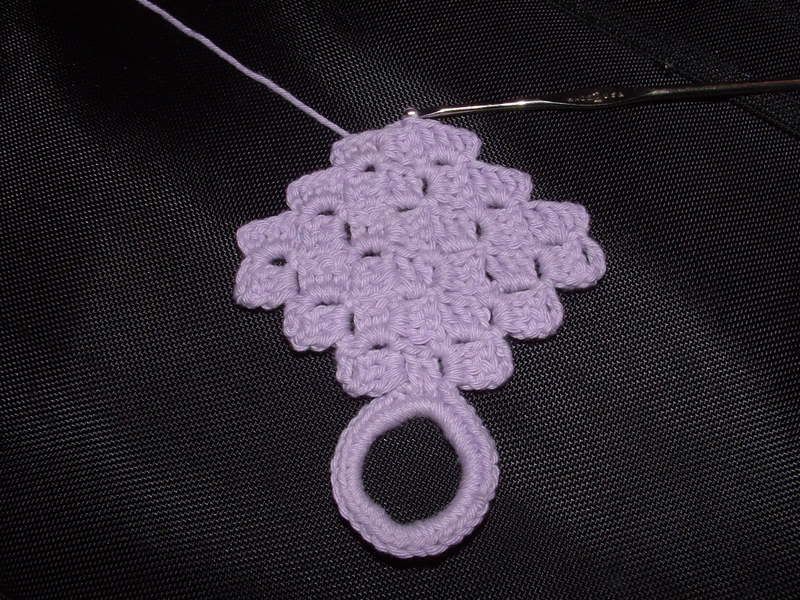 Continuing working the following pattern until you have reached the length you desire.
 Cluster in the current space, Cluster in space between 2nd and 3rd Dc of Cluster just made, attatch with a Sl st to the Ch 3 space of the Cluster to the left.
Cluster in that space, attatch with a Sl st to the Ch 3 space of the Cluster to the left until you come to the side.
Cluster in the top of the two clusters on the side and then Ch 3, turn and attach to the Ch 3 space of the Cluster just made.
Cluster in the Ch 3 space, attach to the Ch 3 space to the left until you reach the top.
Cluster in the top Ch 3 space, cluster in the space between the 2nd and 3rd Dc of the cluster just made, attach with a Sl st to the Ch 3 space of the cluster to the left.
Continue to CLuster and attatch with a Sl st until you reach the side.
Once again Cluster in the top of the two side Clusters, Ch 3, turn and attach to the Ch 3 space of the Cluster just made.
Cluster in the Ch 3 space, attach to the Ch 3 space to the left until you reach the top and join with a Sl st in the Ch 3 space.
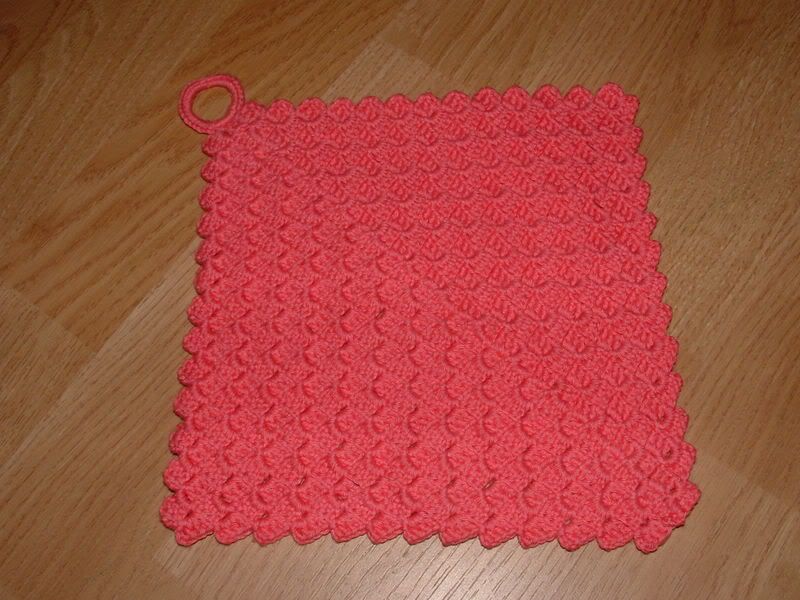
Once you get the beginning section done, the pattern goes very quickly and easily.
If you have questions on this pattern (or if my directions do not make sense to you) please send me an e-mail [ kaml19 [at] yahoo [dot] com] or leave a comment.
Legal jargon:
Copyright © 2006 Kimberly Langlois All rights reserved.
Reproducing or transmitting this pattern by any means for any purpose other than for personal use constitutes a violation of copyright law.
This dishcloth may be made for personal use only. Should you wish to make the finished dishcloths for sale, please contact for permission. Should you wish to use this pattern for a class or event, please contact for permission.
34 comments:
Oooh, thanks for posting this-it's seems daunting, but I wanna try it! I thought it was a broomstick pattern originally-I have to get some #3 cotton, but I will.
WOW Kimberly! Congratulations for such a professional tutorial!!! And thank you for sharing! It looks very very pretty!
PS: Only 44! ;)
Yay!!! It looks wonderful and the pattern seems easy, especially with tutorial pics. Splendid job Kimberly, thanks for sharing =)
Thanks for the pattern Kimberly!!The pattern looks very pretty.I wanna try it sometime too.Love the picture tutorial you've done there.tfs
Thank everyone! The pattern is fairly easy, and the pictures should hopefully clear up where I was going wrong when I first attempted the pattern without any visual aids!
For yarn, I used a size 3 cotton, but you can use smaller or larger with the appropriate hook sizes!
Thanks so much for posting the pattern for this very pretty stitch. I'll definetly try it, and post about it. I think this could be used for many projects.
Oh, I really like that! I'm gonna have to add it to my list of things to do :)
This is a lovely dishcloth!!
I look forward to making it.
This is now on my very long WIM list. It's almost to pretty for a dish cloth.
Kimberly, I just love your pattern! It's beautiful. Thank you so much for sharing.
Kimberly , thank you for sharing and the wonderful tutorial- I must say it's so well done , so professional.
It's a very pretty dich cloth and would make lovely gift. I look forward to making it.
Thank you very much for the pattern and the tutorial! I plan on making this one soon!
Oh great stuff! I just want to thank you from the bottom of my heart for this tute. And the discloth is excatly what I was looking for: something to make for a christmast gift. The photo's and the instructions were perfect. I, as a beginner, had to take apart my work 3 times because I just couldn't get it. But then one shouldn't try,as a beginner, at 24:10 in the evening. When I got it after the first 6 clusters I was just smiling all the time. Thanx!
ps.unfortunately I can't show it because the one that will receive this from me may be visiting here as wel lol!
Thank you sooo much! I do believe this is the same stitch used in the baby afghan picture my sister sent me. Can't wait to give it a whirl!!!
That is truly beautiful~maybe it will be my very first thread project.... (((((HUGS))))) sandi
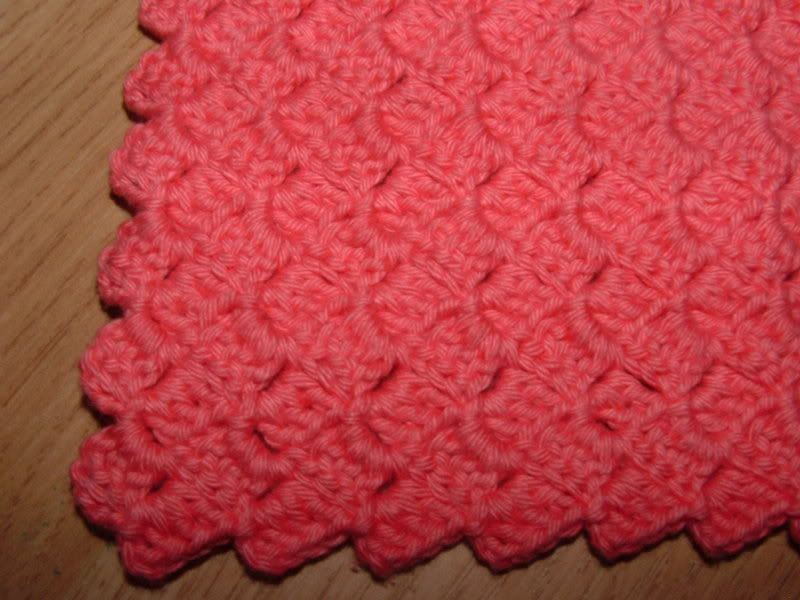
Very nice. It's an interesting stitch and I like the texture. Very pretty. Thank you. :-)
OH!!! That is so pretty! & it will be in the drawer by the end of the week!!!
THANKS!!
Thought you might be interested to know that my Grandmother taught me this pattern when I was a young girl. She made these into potholders rather than dishcloths and I have been doing the same for 50 years.
Hmmm...I can't get this. Mine looks like a jagged quarter circle.
What am I doing wrong?
Please Help! I have started this dishcloth 3 times. I really want to make it. I have family that has just started to use them. Do u have a you tube video of it? It would be so awesome if you could do that. i am lost at Cluster in the top of the two clusters on the side and then Ch 3, turn and attach to the Ch 3 space of the Cluster just made.
my email is lizshade@yahoo.com I have taken a picture where I got stuck. It is lovely Please help
Love, Love, LOVE this pattern! It worked up quickly (although it did take a bit of patience in the beginning) and turned out great. Thank you so much!
Hi
I made this dishcloth and had to do it over 3 times. I found that the instructions for the two side clusters would be improved if you said: "Cluster in the top first cluster of the two side clusters, CH3, turn and attach to the CH3 space of the Cluster just made." It may be that I just did not understand, but I really feel this would clarify it for people that are starting out.
All in all the tutorial was great and the photos a great help.
Thanks for presenting an interesting and challenging pattern which I will enjoy making over and over again.
Sincerely,
Sharon
This is a lovely pattern. Thanks Sharon for the hint below. I hope to make this sometime in the future. I like unusual patterns. I'm knitting a square to go on a chair in self-striping chunky velour yarn that starts from the corner also. Very easy. Yours is much prettier.
I am just not getting this for some reason. I thought the pictures would help since I'm a visual learner but I'm still not picking it up. I understood the first set of DC's in the first 3 SC and even the first cluster but past that mine ended up looking like a weird circle of clusters instead of a square of clusters. Please help! :) If you click on my name it will lead you to my email address. Thanks so much!
Hey! I'm making a selection of dishclothes to donate to a fundraising event for The Relay For Life and was hoping you would give your consent to reproduce these. Please email me back at sophia_g333@hotmail.com.
Thanks for the pattern! I got it on the first try and it worked up quickly and is really beautiful.
Try using "Sugar & Cream" cotton yarn. It is availale in most crafts stores in the US. It is the best to use for dishcloths.
I have tried to do this pattern over and over,I have been crocheting for 48 years and can't figure the instructions.Its so frustrating! do you have a youtube tutorial?
Lovely,thanks for you post.
Hello is this an old pattern or a new version of and old Pattern. I tried to make one and had a hard time . Is there an easier way? Is the pattern in and old book? It sure is a nice dish cloth. Thanks for the pattern.
can't follow this , don't know what i'm doing wrong ;(
I wish there was a video tutorial.
I got hung up on the "cluster 2 on side". It's one cluster than the second goes into the 2&3 of the 1st cluster. you're working 4 sides going down one side then, up, down, up turn and back around - it never joins on the 4th corner (where the circle is). The chain 3 & join to cluster just made is the end of the row. If you turn it 90 degrees - it's a square and a little easier to see the pattern of the pattern. Hope this helps. Follow the pictures close for the starting steps, than just repeat what you're doing. It's easy once you've got the first 8 or so clusters done and get the "rhythm" goung. Good luck!
I really like this and would like to try it, but the pattern I found has the pictures over part of the instructions. Is there a place I can find the complete pattern instructions? Thanks.
Post a Comment